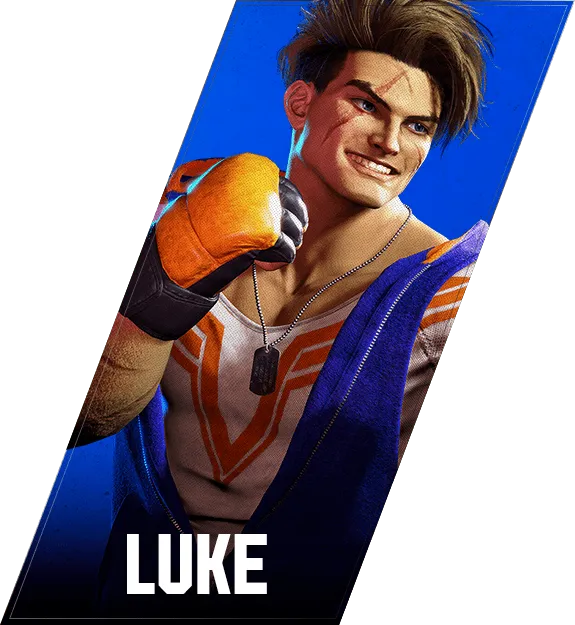

ルーク
Luke — 대책
Key Info
- Sustained overhead — no combo on hit
- 6MP
- On wakeup, watch for OD Avenger (→K follow-up)
- Allows Eraser (214214P) follow-up on hit — be careful at low health
- Defence
- OD Rising Upper (623PP): 6F startup, fully invincible
- If you play Luke or Kimberly, avoid Drive Rush after throws
- Rising Upper LP (623LP): 5F startup, anti-air invincible
- SA1 (236236P): 6F startup, no projectile invincibility
- SA2 Eraser (214214P): 5F startup, projectile invincible
- SA3 Pale Rider (236236K): 10F startup
- OD Rising Upper (623PP): 6F startup, fully invincible
- Advantage on block
- 2MP: +1F
- Flash Knuckle HP hold (214HP hold): +4F
Neutral Game (Focus Points)
- Drive Gauge management
- Luke has few confirm-into-knockdown combos without Drive Rush, making him dependent on Cancel Rush
- His Drive Gauge recovery options are limited, putting him at high risk of Burnout
- Sandblast (236P) can recover some gauge but cannot be thrown out safely, making it riskier than other characters' fireballs
- During okizeme, lean toward strikes to chip his Drive Gauge
- Do not force-stop his Drive Rush
- Luke's Drive Rush has excellent reach and speed — create at least one deliberate window per round to watch for it
- If you do try to stop it, do so at a range where Suppressor (4HP) cannot reach
- Use anti-air invincible moves to counter his jumps
- Jumping HP stuffs most standing anti-air normals — use moves with anti-air invincibility instead
- His jumping HK also has a broken hitbox — research how your character's anti-air options hold up
- Accept throws from LPLK in the center
- After he guards c.MK cancel and forces close-range advantage, accepting the throw is the right answer
- Luke's post-LPLK situation is poor away from the corner, so just take it
- Trying to tech carelessly and eating his delayed tech punish 4HP is one of the most common loss patterns
- Favour meaty jump-in routes on offence
- Luke's LP has 7F startup, so he cannot fuzzy-guard a safe-jump whiff bait
- Use attacks that require a standing 4F response as your offence entry points
- Kimberly: forward HK
- Dhalsim: Float → Yoga Teleport
- The universal option for every character that requires a 4F standing response is a meaty jump-in — use it aggressively on oki
- Drive Rush
- Hard to stop if you are not watching for it. Do not force-stop if you missed the visual cue.
- When not watching: Parry is the safe option.
- If stopping, use c.LP at close range.
- Trying to stop Drive Rush from long range will get you hit by Suppressor — stay quiet instead.
- Maintain a position where Suppressor and HP Flash Knuckle cannot reach.
- Keep the spacing closer than starting distance.
Rising Upper (623P)
Luke's anti-air special. Startup and reach vary by strength.
- 623LP: 5F startup
- 623MP: 6F startup
- 623HP: 9F startup
- 623PP (OD): 6F startup, fully invincible — excellent post-hit okizeme for Luke
Recommended Counter
All strengths are very easy to use — do not jump carelessly.
- OD Rising Upper (623PP)
- Luke is +25F on hit
- One of the rare characters who can apply okizeme after landing an invincible reversal
- He can use Drive Rush to continue pressure, but in-place wakeup makes walk shimmy impossible
- If you eat this, take in-place wakeup
Avenger (236K)
Luke's advancing special. Mainly used in wakeup setplay.
Branches into two follow-ups:
- No Chaser (→P on Avenger): -16F on block for Luke
- Impaler (→K on Avenger): -22F on block for Luke
- OD No Chaser (→P on OD Avenger): -6F on block for Luke
- OD Impaler (→K on OD Avenger): -3F on block for Luke
Recommended Counter
Since this is mainly used in wakeup setplay, you will rarely see it in neutral. However, if you block it outside a setplay situation, everything except OD Impaler (→K) is punishable — keep that in mind.
Flash Knuckle LP (214LP)
Luke is +32F on hit. Used as a combo ender.
When this hits you, a guessing game between in-place wakeup and back wakeup begins — understand the difference.
- In-place wakeup: makes shimmy impossible when he uses Drive Rush
- Back wakeup: no okizeme if he does not use Drive Rush
Recommended Counter
From midscreen, Luke will not want to give up his important okizeme, so he will Drive Rush to continue pressure. At that point, in-place wakeup is the right choice — it shuts down his walk shimmy option.
When you choose in-place wakeup:
- OD reversal and delayed tech have high expected value if he uses Drive Rush
When you choose back wakeup:
- He gets no okizeme if he does not use Drive Rush
Flash Knuckle MP (214MP)
Used as a just-frame combo from 2HP. Stabilising this just-frame is difficult for Luke. If he drops it, Drive Impact is guaranteed — build the habit of pressing Drive Impact the moment you see the 214MP animation.
Recommended Counter
Reacting to Drive Impact on sight every time is difficult. Instead, read the 2HP animation before 214MP and buffer Drive Impact during that motion. Since 2HP is punishable without a special cancel, he will always follow it with something.
Warning
OD Sandblast (236PP) beats Drive Impact on the 2HP confirm, but the Drive Gauge cost is enormous — Luke rarely does this. Ignore it.
Flash Knuckle HP (214HP)
Cancellable from virtually any normal. The held version leaves Luke at +4F on block (throw range in the corner). The non-held version is -4F on block — punish with a light attack into a combo.
- LP→MP→HP → HP Flash Knuckle
- Staying still means you block the held version and he gains advantage
- When you see the Triple Impact (LP→MP→HP), respond with a projectile-invincible SA
- HP → HP Flash Knuckle
- Against Luke without SA3 (Pale Rider), repeatedly pressing Drive Impact after seeing HP tends to connect
- HP cancel often creates a block string, making Drive Impact hard to leak — buffering Drive Impact when you see a cancel action is very effective
- The only reliable answer to Drive Impact here is OD Sandblast (236PP), which costs heavy Drive Gauge — Luke is reluctant to choose it
Recommended Counter
Drive Impact on reaction is generally fine, but if Luke has SA3 (Pale Rider) stocked, a successful Drive Impact can be canceled into massive damage. Use fuzzy back jump in that situation.
- Fuzzy back jump
- 214HP (non-hold) hits on frame 23 / 214HP (hold) hits on frame 33
- Input back jump in the 23–33F window: you guard the non-hold version, and the hold version is beaten by your jump attack (timing-dependent)
- Luke can counter the fuzzy back jump by slightly delaying HP Flash Knuckle
- In that case Drive Impact expected value rises — keep cycling through the guessing game
- If you block, punish with a 4F starter
Warning
Executing the above at perfect timing covers everything, but it is extremely difficult mid-match and Luke may choose to slightly delay 214HP to beat your timing.
When that happens, recognise that an instant back jump is also fine:
- If Luke lands 214HP: 1000 damage to you
- If your back jump attack connects: ~3000 damage
If he has SA3 (Pale Rider) stocked, there is a risk of a big combo on the jump — but confirming that jump is genuinely very difficult, so do not worry about it.
Sandblast (236P)
Luke's fast-travelling projectile.
- 236LP: fast startup, short reach
- 236MP: middle ground between LP and HP
- 236HP: slow startup, long reach
- 236PP (OD): can follow up with →PP
High recovery limits safe use to special cancels from normals.
- HP → 236P
- Luke's stable option (builds Drive Gauge advantage). Tip-range HP has no punish window.
- When you see HP, buffer a wide-hitbox invincible move; if that is too hard, Parry is fine
- In the corner when held down by this string, holding forward jump can cause the HP → Sandblast cancel to whiff, allowing a punish
Recommended Counter
- In the corner when held by normal cancel → 236P:
- Forward jump is effective — HP can air-hit and allow a punish opportunity
- When Sandblast is frequent in the center:
- Forward jump: safe fireball release is difficult for him, so jump in aggressively
- Just Parry: when Parrying at close range, properly buffer a heavy follow-up after the step
6HP
There is a 5F gap between 6HP and the 6HP→6HP follow-up, so any 4F move can interrupt it.
Recommended Counter
- Fastest c.LP
- Beats the 6HP→6HP follow-up
- On hit, aim for c.LP → c.MP for maximum return
Warning
More Luke players are now going for Just Parry against fastest c.LP.
Add throw to your options. If you throw at the absolute fastest frame, the second-hit follow-up will beat it — use a fuzzy throw instead.
- Fuzzy throw
- Beats Luke pressing Parry
- Input the throw at the timing you would block the 6HP→6HP follow-up
The clip below records:
- 6HP→6HP→236MP
- 6HP→Parry
MP→MP→MP→MP (Snapback Combo)
Luke's MP-starter Snapback Combo is punishable from the second hit onward if you block — every subsequent hit is +8F or more of punish window.
Recommended Counter
- Once you see the second hit of the Snapback Combo, mash an 8F-or-faster move
- It is a block string so the move will not leak out
LP→MP→HP (Target Combo)
Luke's target combo. He can cancel into various specials at the end. Blocking 236P is fine, but Flash Knuckle HP can set up an unfair situation — have a counter ready.
236HP follow-up: +1F disadvantage for Luke on crouching guard.
- 236LP: -8F crouching guard / -7F standing guard
- 236MP: -5F crouching guard / -4F standing guard
- 236HP: -2F crouching guard / -1F standing guard
Recommended Counter
- Drive Impact is viable but watch out — OD Sandblast (236PP) and HP Flash Knuckle → SA3 cancel will punish it
- The moment you see LP→MP→HP, buffer a projectile-invincible SA or a wide-hitbox OD invincible move
- If the buffer succeeds but your SA does not come out, Luke chose 236LP — punish with an 8F move
- Be careful: using an invincible move without projectile invincibility will still get hit by 236P
- Depending on your character, the OD invincible may whiff against HP Flash Knuckle due to 214HP's backward movement
2MP
+1F on block. Luke's pressure strings from 2MP:
- 2MP → 2LP → 2MP → 236P
- 2MP → 2MP → 2MK → 236P
- 2MP → 2LP → 236P
Recommended Counter
A simple guide for players unsure when to mash:
- After blocking two normals, mash a light attack
- Against all three strings above, placing a 4F–5F normal with good reach leads to a counter-hit combo
- Make sure the button properly routes into a combo
The clip records all three strings:
- 2MP → 2LP → 2MP → 236P
- 2MP → 2MP → 2MK → 236P
- 2MP → 2LP → 236P
HK (Cannonball)
Long active frames — landing the last active frame gives +1F. Screen shake confirms the last active frame landed. No shake means at best ±0F — mash immediately.
This move is most commonly used in okizeme setplay, so learn the HK setplay timing and aim for Just Parry.
Recommended Counter
- Outside a setplay, landing the last active frame is impossible
- When the last active frame lands and gives him advantage, the screen shakes — if it does not shake, mash at the fastest possible frame
LPLK (Forward Throw)
Luke is +19F. In the center you can manage the situation with the right responses.
- In-place wakeup: Luke can apply okizeme with a short walk — LPLK will also be meaty; however, if he used Drive Rush, OD reversal is guaranteed
- Back wakeup: Luke can apply okizeme with Drive Rush — even if you react to the Drive Rush, he can cancel into HP Flash Knuckle or LPLK to stop, making it hard to interrupt
- SA reversals risk super flash counter — for reliable safety, choose a fast OD invincible over SA
Recommended Counter
- Stay aware that this is a guessing game — do not auto-pilot back wakeup every time
- Start with in-place wakeup to hold your screen position, then punish Drive Rush with OD reversal when you see it
- A 7F-or-faster invincible move is guaranteed unless he super-flash-counters
- Even after back wakeup, SAs with long reach are still guaranteed — Luke's SA1 or Manon's SA2 almost always connect after back wakeup with just a pre-emptive SA input
Luke SA1:
Manon SA2:
Warning
- After back wakeup, OD reversal is NOT guaranteed
- An 8F-or-slower invincible move does NOT punish
4LPLK (Back Throw)
Luke is +14F. The post-throw situation is not particularly dangerous.
- Back wakeup is standard in the center
- Even without any wakeup roll, only HP can barely reach
- Without a wakeup roll, OD reversal is guaranteed when you see Drive Rush
Recommended Counter
- Back wakeup is the baseline — the spacing is too far for meaningful okizeme
- In-place wakeup is also fine
- Strikes are meaty but throw is not — think of it as trading Drive Gauge for screen position
- Confirm Drive Rush and fire OD reversal
- In the corner: HK lands with its last active frame, giving +1F on block
- Just Parry timing is predictable here — go for it